
Math Racer
Overview
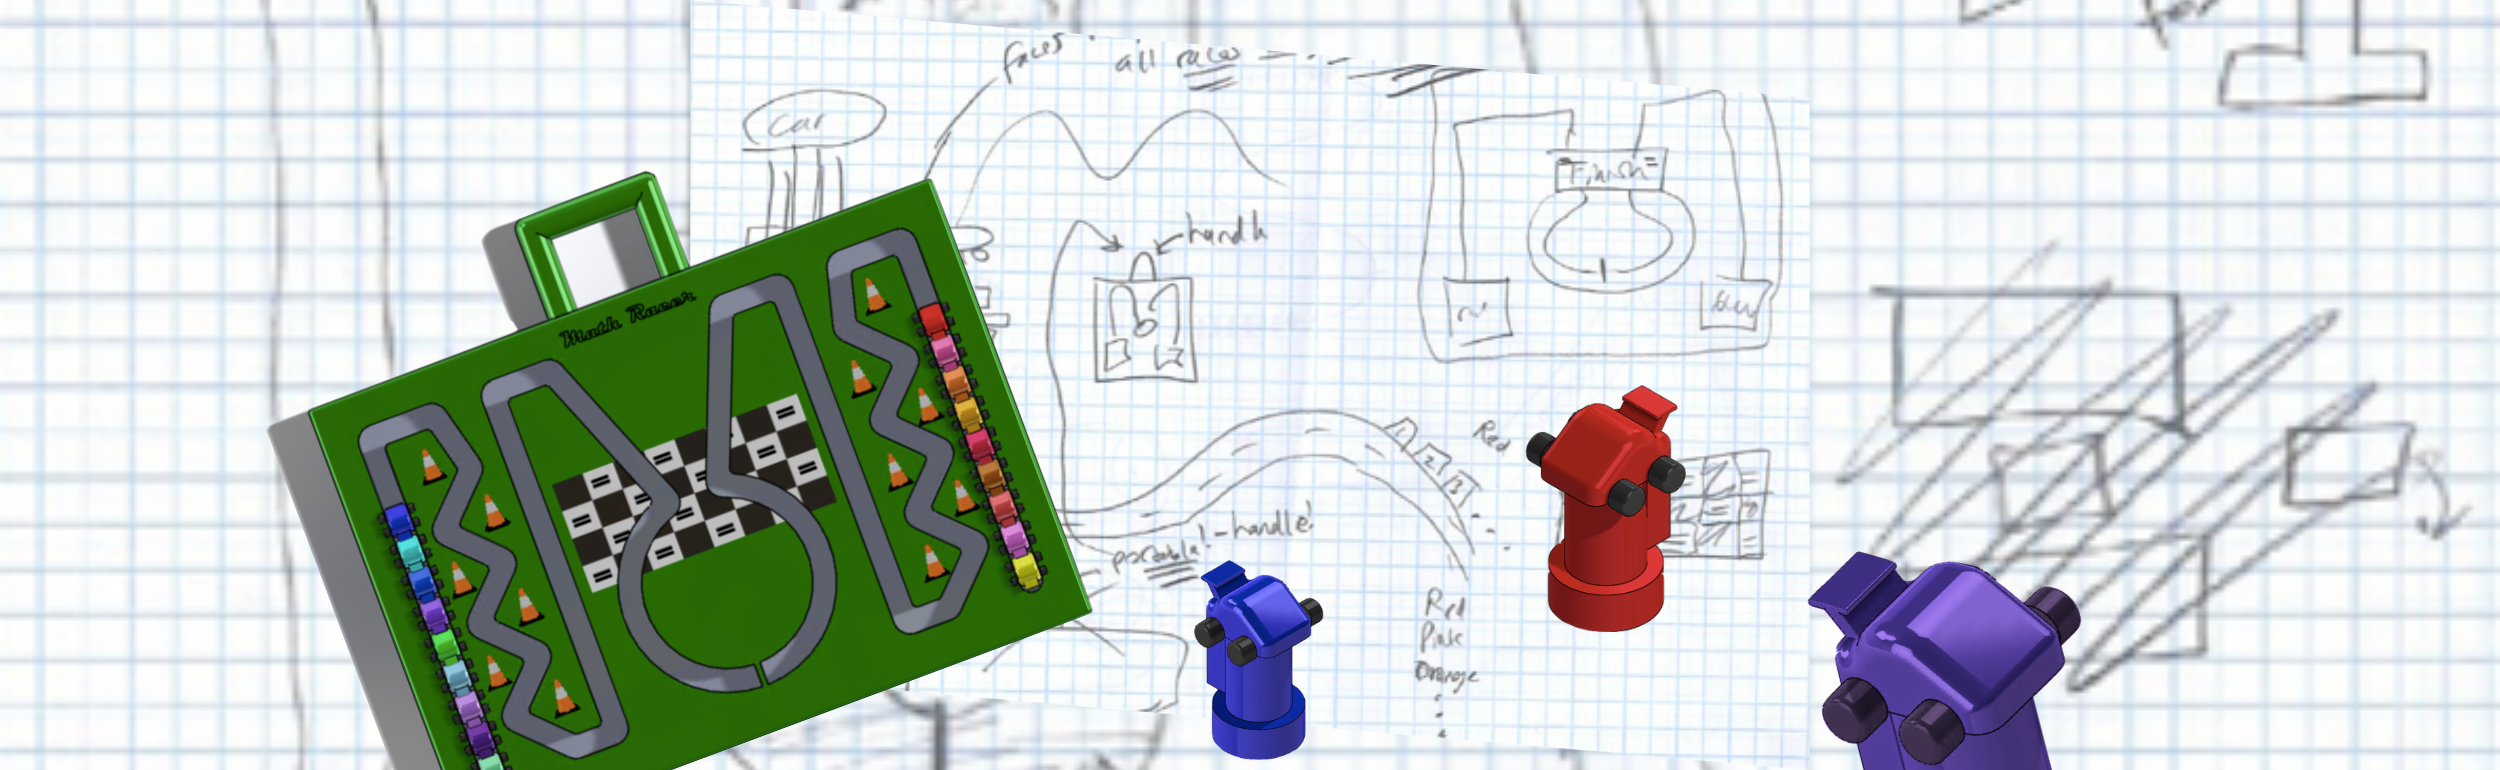
Math Racer is an educational toy for children ages 3 to 6 years old that is designed to teach counting, addition, and subtraction in an exciting and interactive way! By physically moving the cars in and out of the winner’s circle, the child’s addition and subtraction skills will be fortified through both visual and tactile stimuli. Moreover, this toy is meant to be taken on-the-go and shared with parents, siblings, and friends, effectively building relationships and improving social skills too.
Timeline
2 weeks
Team
Andrew P.
Roles
Product Engineer, User Researcher
Tools
SolidWorks, Google Workspace
Objective
In our Computer Graphics and Design course at Columbia University, our final task was to design and produce project documentation for a fully portable educational toy that could be used to teach kids how to add and subtract single digits (from 0 to 9).
The following design criteria were in place:
1) Must be safe for children, i.e.
a) Non-toxic materials
b) Not easily breakable
c) No small, loose parts
2) Must be designed for high volume manufacturing
3) No electrical or magnetic components
Initial Design Opportunity
Children love hands-on experiences. To effectively teach them the skill of counting, our goal was to design a colorful, portable, and interactive toy in a new and creative way all while keeping the design restrictions in mind. To make our toy even more intriguing, we incorporated multiplayer interaction to bring about some healthy competition.
Research
We began with a thorough Internet search of popular counting toys. Due to its bright colors and popularity, we decided to build upon the abacus and transform it into a more entertaining toy for toddlers.
After choosing a racecar theme, we then researched material properties, average children's hand & finger sizes, as well as choking hazard definitions to ensure a child-safe toy.
Design Process
Brainstorming
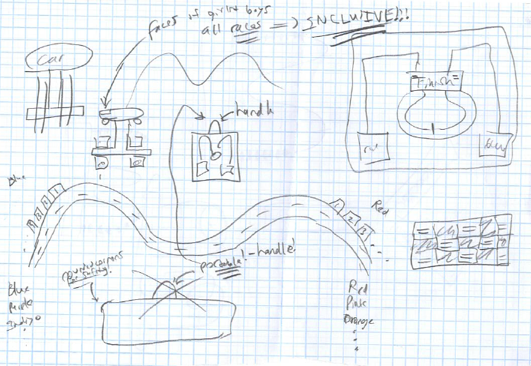
To begin the project, my teammate and I sketched out several ideas for our toy which drew inspiration from the abacus. This step in the process helped us identify key elements we wanted to see in the final iteration of our product such as child-safe components, portability, and the ability to be easily shared.
Low Fidelity Designing
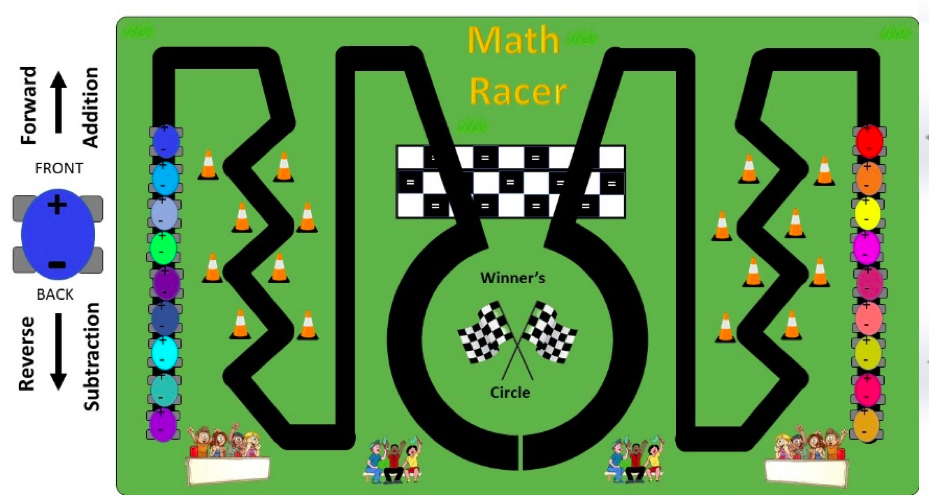
Once we settled on a final design, the above low fidelity rendering was created to help guide the CAD modeling. This step was essential in understanding how components fit together and how the toy cars would move within the slots of the larger tracks.
Detailing
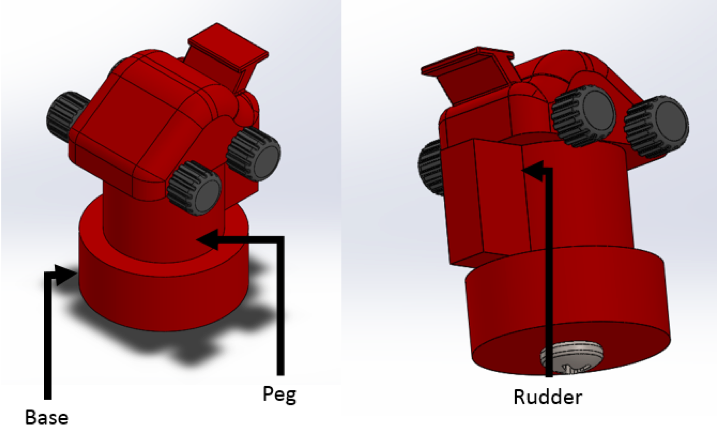
The last step in designing Math Racer was to focus on the details that would ensure a safe and foolproof toy. The inclusion of rounded corners within the slotted paths and rudders on the toy cars that prevented them from spinning are just two examples that highlight the careful thinking that took place in the design process.
Final Product
How it works
TO ADD
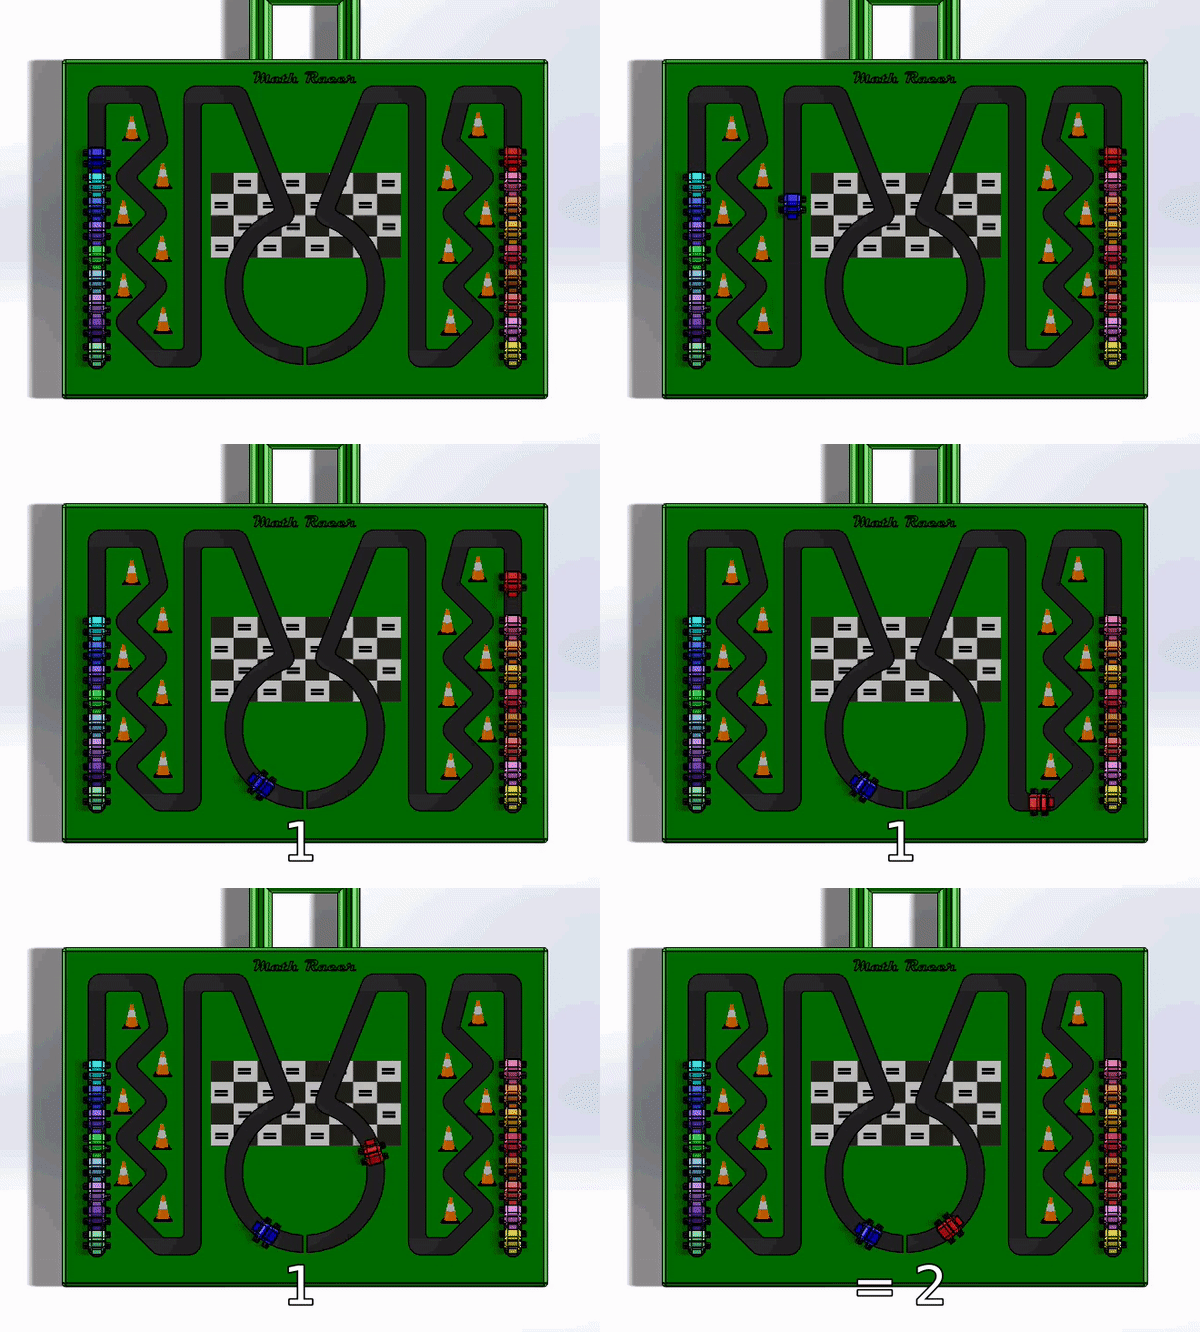
The child chooses two numbers to add (e.g. 1 and 1 as shown in the gif)
The child pushes 1 car from the left track into the winner’s circle
Then the child pushes 1 car from the right into the winner’s circle
Lastly, the child counts the total number of cars in the winner’s circle and learns that 1 + 1 = 2
TO SUBTRACT
The child begins with a set number of toy cars in the winner’s circle (for example, 7 total cars with 3 on the left track and 4 on the right track)
Next, the child removes a set number from the winner’s circle (let’s say they remove 2 cars from either of the tracks)
Finally, the child counts the number of remaining cars in the winner’s circle (5 in this case) and learns that 7 - 2 = 5
Lessons Learned
Don’t forget material thickness.
After designing and mating all of the individual pieces in our assembly, we realized that the cars would not make it through the zigzag portion of the slotted track because we did not account for the thickness of the cars’ bottom pegs. To fix our mistake, we had to redesign the entire slot and redo all of the slotted mates.
SolidWorks subassemblies are a true blessing.
Our toy consists of a total of 18 individual moving car pieces. To make the overall assembly of our toy much easier, we took advantage of SolidWorks subassemblies to facilitate changes to the car pieces and to speed up the mating process.
SolidWorks motion analyses take time!
Before this project, we had only performed one motion analysis in class. We really struggled to get our pieces to move the way we wanted to on the track. It didn’t take long for us to learn that SolidWorks’ motion analysis tool is not very user-friendly. Still, we persisted, and after countless video tutorials, we finally put together the motion analyses needed for our final presentation.